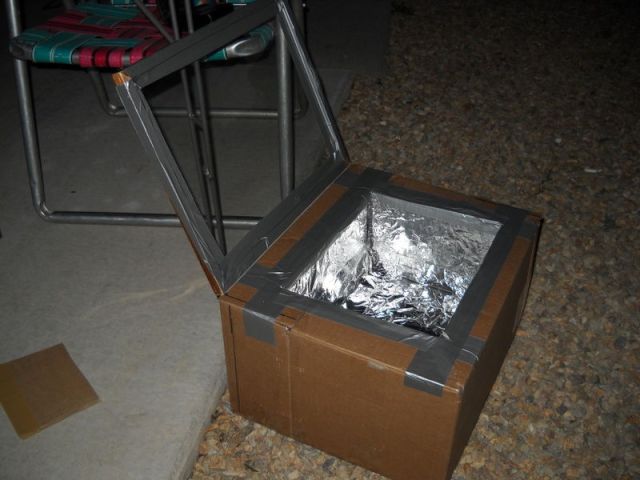
 This is how to make a solar oven using a tempered glass picture frame (or simply a regular glass one), some newspapers, a roll of aluminum foil, duct tape, two cardboard boxes and a bit of white glue.
Are you tired from the old oven at home, which seems to be consuming incredible amounts of electricity? If yes, then you will definitely enjoy the following tutorial.
1. Prepare the frame and the boxes
When you select the solar oven cardboard boxes, make sure that one of them is of the same size as the glass frame, while the other one is 2-3 inches larger. Cut a hole into the large one, so that it can fit the smaller one inside. The space between the two boxes fill with the crumpled newspapers. Once this is all done, and the small box is fitted inside the big one, tape them up using the duct tape.
2. Line the inside of the solar oven
Take the aluminum foil and using the white glue line the inside of your future solar oven. It is a good idea if you extend the foil out of the box and over the top, and also reverse the door so that the tape is on the outside.
3. Place the reflectors
To make the reflectors cut out pieces of cardboard and glue some aluminum foil onto them (the shiny side of the foil should be facing down). After the glue is dry, trim the foil and tape the edges with the duct tape.
4. Test your solar oven
Put the oven at a 60 degrees angle, so that the sun is focused on the pan. If you have to adjust the light beam you can make a few holes.
5. Start “Solar Cooking”
If you would like to have a bit more control over the temperature of the newly-made solar oven, you can make a hole at the back of the oven and insert a thermometer.
Happy Solar Cooking!
Special thanks to Instructables user Aleutianwind for the idea and great picture tutorial.


The angle is determined by your location, and is related to the day of the year and the latitude.
At 45 deg latitude (wear I live, at Summer Solstice, the angle is 45-22.5 or 22.5 Degrees. At winter solstice our angle is 67.5. Spring & Fall Solstices are 56.5.*
Put a paper tube or such, in the outer corner of the big box, outside the insulating paper. Put holes at each end through the box. This one of the back corners of the cooker.
To set up, simply point it at the sun, and lift the back edge until the sun shows a spot of light in the shadow of the box, then brace it at that point. Rotating it so it still faces the sun, and adjusting the angle once in a while will increase the heat level, but unless it is before 10 am or after 2 pm this probably isn’t necessary. Cooking may take a little longer.
This can be used for some dishes, which don’t need to get as hot, without moving the box.
A thermometer inside the or under the dish will help you monitor the temperature
cause you need to have the light reflect
I need it for a school project
good job
Why do you put the shiny side down? I would think you’d want the shiny side of the foil exposed to the sun.