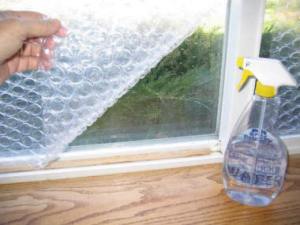
 Here we would like to show you how to improve your window insulation by using bubble wrap.
Over the last few days we published a series of articles showing how to save energy and cut down electricity bills at home. Undoubtedly, the first step towards having an energy efficient house is to ensure that there is a good and functional window insulation.

Step 1. Choose the type of bubble wrap.
Most recommended is the one with medium to large-sized bubbles. The larger the bubbles, the better the insulation.
Step 2. Cut out a piece of bubble wrap the size of the window.
Step 3. Using a water-filled spray bottle, spray the window.
This will ensure the glass is wet and the bubble wrap will adhere to it.
Step 4. While the window is still wet, apply the bubble on the window wrap and press it with the bubble side going towards the window.
Step 5. If you would like to remove the bubble wrap after it has dried, add Glycerin to the water and spray over the wrap.
And you are done!
Some additional tips and remarks.
Although this type of bubble-wrap on window insulation lets enough light get through the window, the view might be slightly fuzzy.
So in case you would like to remove it in the summer months, you can always reuse later on.
For maximum effect, you can always try to apply a second layer of bubble wrap. The insulation does improve, however the weight increases, which lowers the chances of the wrap to stick to the window for a longer period of time.
Some tests done by users show that typically one layer of bubble wrap window insulation can last perfectly well for a period of 5-6 years.
The tutorial has been kindly provided by Gary Reysa, at BuildItSolar.


lizzite No, it is to be place on the inside. Makes such a difference !
You don’t say which side of the windows to put it on. I believe OUTSIDE is correct – otherwise there will be condensation on the glass and puddles on that nice wood sill.